Some useful information and controls are hidden away in the Settings Panel. To see them,press the Settings Key on the Control Panel (circled in red in the photo below):
You’ll come to the first page of settings. You can cycle through the various options by pressing the > (next) and < (previous) keys.
The available options are:
Screen 1
Needle Position – Up or Down: Sets the position of the needle when the machine stops.
Width Control – On or Off: If this setting is “Off,” the sewing speed controller is used to change the speed of the stitching. If you turn it “On,” you can use it to quickly and easily adjust the width of the stitch while you’re sewing. This is useful for creating decorative stitches. In this case, you need to use the foot controller to control the speed of sewing. This function is only used for sewing because in embroidery the stitch width is controlled by the design itself. For more details, see page 58 in the Operation Manual.
Screen 2
The first two settings on this screen control the type of information that is displayed during embroidery. The choices are:
Needle Count. The LCD display shows the current stitch number / total stitches while embroidering. The stitch number is useful to know in case something happens during the embroidery. Then you can fix the problem, back up a few stitches and start stitching again. If you have to turn the machine off, note this number and you can advance by color and/or by stitch to get back where you were without having to start over.
Number of Color. Displays the thread color number. When this is selected, you can choose the brand of thread with the second line of settings. This is only useful if you use one of the thread brands in the list.
Name of Color. Thread color name. I don’t find this very useful because I use a different brand of thread than it knows about. So it maps the color information to Brother’s thread colors and always gets it wrong.
Time. I’ve never used this and don’t really know what it is.
The third line on this screen lets you change the units from inches to millimeters (mm) (1 cm = 10 mm if you need to convert from centimeters).
Screen 3
Buzzer. On or Off. By default, the machine is set to beep once whenever you press a control or beep more times if there’s an error. You can turn the beeps off here.
Initial Position. Sets whether the embroidery pattern is positioned in the center (default) or lower left of the embroidery frame when you select a pattern. You can change the position for each design using the Adjust > Layout functions.
English. You can change the language to many others.
Screen 4
You can change the brightness of the LCD display.
Screen 5
NO. This is the machine ID which is unique to your machine and is different than the machine serial number. It is used to license designs from Brother’s ibroidery.com site to your particular machine.
Version: The version of the software in the Brother SE400.
I could find hardly any information about the settings in the manual. So I hope this helps.
I have always loved embroidery, especially exquisite traditional needlework. When I was a child I did a little cross stitch and other needlework. This was long before home embroidery machines were available. But creating by hand was too slow and tedious for me, so I abandoned my projects until I got my Brother SE400. The SE400 can’t stitch these designs. But I still love to look at them for inspiration.
Traditional Embroidery Still Alive in Assisi, Italy
I lived in the hills outside of Assisi, Italy for 13 years. Assisi is the charming Italian hill-town where Saint Francis was born and is one of my favorite cities in all the world. Thanks to local building regulations, much of the 14th century town is preserved.
One time, I was strolling around the back streets away from the usual tourist spots when I noticed women sitting in front of their homes embroidering in a style I had never seen before. They were filling in the background with an unusual type of cross stitch and the motifs were only outlined with a running stitch. The interior of the motifs were left plain or “void.” This was the opposite of the needlework I did as a child, where I embroidered the motifs and left the background plain. It was beautifully worked. The designs were rather strange like the medieval symbology which you see everywhere in the churches in Italy.
What Is Assisi Embroidery?
Assisi embroidery is based on a medieval Italian tradition where the motifs are outlined in a double running (Holbein) stitch, leaving the interior void. In the earliest work, the stitches were not counted. The design was just drawn freely on the linen. In modern adaptations, Assisi embroidery is counted-thread embroidery.
Traditionally, the background was densely filled with long-armed cross stitch. Normal cross stitch is also used especially in modern Assisi embroidery.
The actual design is created by the unworked natural linen fabric which shows through against the worked background. You can’t see it so much in this photo, but the “negative” effect gives Assisi needlework a woodcut quality that I find very rich and unique.
Unique Characteristics of Assisi Embroidery
The following characteristics make Assisi Embroidery so powerful and charming, and distinguish it from other voided styles.
Traditional motifs were based on medieval symbology featuring grotesque figures of satyrs, demons, ancient mythical birds and animals, beasts. Other patterns look like flowers, branches, leaves, fruit. Often a candelabra design is used to separate the mirrored motifs. The designs are beautiful and very mysterious. Earlier designs from the 13th and 14th centuries are more primitive, rugged. In the 15th and 16th centuries, they became more sophisticated and natural.
The motifs are laid out in symmetrical pairs surrounded by elaborate scrollwork. Some motifs are used to connect different parts of the design so that there is never a lot of empty space. Often these motifs are designed in a very beautiful way that draws the eye to the main motifs. The repetition and symmetry of the motifs give movement and rhythm to the piece.
The top and bottom of the design was usually bordered by repeating geometric or flower motifs. The borders are worked in a straight stitch with an occasional cross stitch. The color is usually the same color as the background.
Assisi embroidery is worked in only two colors—one color for the background and a contrasting color to outline the motifs. Traditionally red, blue, green or gold was used for the background with black or brown outlines.
Modern Assisi Embroidery
Tablecloth worked by Antonietta Mancinelli, Accademia Punto Assisi.
History of Assisi Embroidery
Italy has an ancient tradition of arts and crafts including embroidery and other handicrafts. In the 13th century, an embroidery style was created in the convents probably by the Poor Clares that became the basis for Assisi embroidery. The motifs were voided on fine linen cloth with the outlines and background embroidered with colored silk. These articles were used for religious purposes such as altar cloths and chasubles.
By the 16th century, Assisi embroidery had become very popular and spread into the secular community. However, in the eighteenth century people lost interest and many of the designs and motifs were lost.
After the new state of Italy was founded in 1861, a movement was started to rediscover and revive traditional handicrafts and provide employment to poor women. in 1902, the “Laboratorio Ricreativo Festivo Feminale San Francisci di Assisi” was founded in Assisi to accomplish these goals. They took the traditional embroidery techniques and simplified them. Embroidery cotton was used instead of silk. The outlines were counted instead of drawn freely on the cloth. The designs and complicated borders were simplified or new designs created. The background was done in simple cross stitch. The color schemes remained the same.
This cottage industry flourished and the more modern designs spread throughout Italy, Europe and rest of the world. In Assisi, the traditional style is still alive and you can see local women sitting in front of their homes, embroidering for the local co-operative embroidery shop.
Are you interested in hand embroidery?
I hope you enjoyed leaning something about this fascinating embroidery style as much as I did. Please leave a comment. I’d love to know what kind of embroidery you do and what you think about Assisi embroidery.
With the Brother PED-Basic® Software and card reader/writer you can download embroidery designs from the Internet and write them from your PC onto original Brother cards.
You can use the Brother PED-Basic Software when you want to embroider designs that aren’t built-in to your embroidery machine, and
Your Brother embroidery machine such as the SE350, LB6770 PRW, or PE700 doesn’t have a USB port.
Or you want to organize your designs on memory cards.
When You Probably Don’t Need This Software
If your embroidery machine has a USB port that is compatible with a USB stick or thumb drive such as the PE770, you can just store designs on a thumb drive and don’t need to write memory cards.
If your embroidery machine has a USB port that attaches to your computer, such as the SE400, HE240, LB6800 PRW, you can download embroidery patterns from your computer and save them in the machine’s memory.
If you want to create or digitize your own design, you will need to buy more advanced software that might include a card writer.
Even if your embroidery machine has a USB port that attaches to your computer for downloading, you might still want to write embroidery designs on a memory card. For example, if you don’t have a laptop or it’s inconvenient to move your computer next to the embroidery machine, you can transfer designs on a memory card.
Of course use your own judgement. You might have a good reason for needing this software that I don’t know about.
Brother PED-Basic® Software Features
Download free or low-cost embroidery designs (.pes format files) from the Internet
Import embroidery designs from CD-ROM
Built-in embroidery samples
Three frame sizes
Resize most designs from 90% to 120%
Print an image of the design and information about the pattern: name, size, number of stitches, and thread colors
Print sewing area box & center axis of the pattern
Print template grid that you can use as a template to place the design on your embroidery project.
Realistic stitch design preview – The stitching and colors are displayed on your computer screen so that you can preview the actual embroidery.
Writes the embroidery design data (.pes files) to Brother original memory cards for your embroidery machine.
For use with all Brother home embroidery machines with a memory card slot.
Note: This product cannot be used to create embroidery data or designs.
Compatible with Windows compatible computers with a USB port and CD-ROM drive. Requires Windows 98 operating system or later. Be sure to check for compatibility with your own computer.
Click here, to download an updated driver from Brother’s Support website. Then click on “PED-Basic Update.” Then select your version of Windows from the options, click “Search” and download the driver. You can also download manuals from the Support Center.
Note: Not compatible with Macintosh. You must use additional software that runs Windows on a Macintosh such as Parallels Desktop, VMWare Fusion, or BootCamp to use PED-Basic with a Macintosh.
What’s Included with the Brother PED-Basic Software?
USB Card Writer Box
CD-Rom containing PED-Basic software installer and sample designs
4M Blank Memory Card (rewritable)
Instruction Manual
Four Easy Steps to Downloading Additional Embroidery Designs
1. Using your computer and the PED-Basic software, download free or purchased PES embroidery data from any embroidery design site or pre-packaged design pack.
2. Preview and/or edit the imported embroidery data on the screen.
3. Write the PES data file to an original Brother embroidery card.
4. Insert the card into the slot on your embroidery machine, press the Memory Card Key on the control panel, and select the design you want to embroider. Continue the same as with a built-in design.
How to Write More than One Design
Many people ask me how to write more than one design or how to add additional designs to a card without overwriting the old designs. It’s easy to do, but the manual isn’t very clear. So here’s how.
Click the browse button and navigate to the folder where your embroidery designs are. This can be a folder on your hard drive or on a CD. Then in the box on the left — the “Available Patterns List” — you’ll see the designs you can copy. Click the pattern you want to write to the card. Then Click the arrow button in the center of the boxes to move the design to the “Selected patterns list.” Do this for all the designs you want to write to the card.
If you already have designs on the card that you want to save, you must select the card first and move those designs to the “Selected patterns list.”
Be sure to keep checking the “Card capacity indicator” because the card may not hold all the designs you want, especially if you have a lot of them from a CD.
You can also select multiple designs by, holding down the Ctrl key or Shift key while clicking the designs. Or you can just drag the designs from the left box to the right box.
All the designs in the right box will get written to the card.
Brother PED-Basic Reviews — What Are Others Saying?
Before you go out and spend your hard earned money on software to download embroidery designs, it’s important to consider what other people think of the product after they’ve owned and used it for awhile. Click here to read the 106 5-star reviews on Amazon.com
If you use the fonts and letter designs built-in to the Brother SE400, you have to stitch each letter separately because you can’t change the size of the individual letters in a “word.” You can set the size of the pre-programmed letters to small, medium or large on the Layout screen. And then you can resize to a certain extent with the size buttons. But you can’t size the letters individually. So if you want a monogram with a large center letter, you have to stitch the letters one at a time, setting the size for each.
If the complete monogram is less than 3.9″×3.9″, it’s easy to adjust the placement because you just move the layout using the positioning keys in the Layout – Adjust screen.You don’t have to re-hoop and the machine stitches a little stitch to help you line up the letters. See the Operation Manual on page 146 for instructions.
Going beyond the built-in styles
If you don’t like the built-in letters or want them smaller or larger, or want a fancy monogram, for example on a towel with letters in a diamond or circle, you’ll need a monogram alphabet design set. It will include three sets of letters: the large center, left and right that you can put together into three letter monograms. Some of them also have designs for borders or flourishes.
There are two options. You can stitch each letter separately and learn how to line them up. This isn’t so difficult if all three letters fit inside the 3.9″×3.9″ embroidery area.
If you want a really big monogram that won’t fit, your only option is to split the design, rehoop and stitch each section separately. But it’s not easy to get the sections lined up and spaced correctly.
The quickest and easiest way is to combine the letters using embroidery editing software, save the design as a PES file, transfer it to the SE400 and stitch it all at once. This will give you a nice design and you won’t have to fuss with spacing and lining up the letters. This only works if the whole monogram is less than 3.9″x3.9″.
Embroidery Editing Software
I can’t recommend particular software because there are so many choices that I can’t keep up with and because so much depends on individual needs and preferences.
Many people like Embird. Some people say Embird is very powerful, but has a steep learning curve. Others prefer different software as less expensive and easier to use. You need the Basic Embird for combining letters from alphabet designs. There are also add-on modules for lettering. One lets you take ordinary fonts from your computer and convert them to embroidery designs. You can also change the shape for a circular or diamond monogram, etc.
People also like SewWhat Pro.
Both Embird and SewWhatPro have free thirty-day trials so you can try it before you buy.
If all you want to do is combine letters, have a look at Combine Design. I haven’t tried it, but it was recommended by one of the ladies on SewForum. At $10 it’s much more affordable than the others (but also much less powerful), and it’s nice and simple to get started. If you go to the site, there is a link to a Youtube video showing how it works. http://www.bowsandclothes.com/index.php?url=sewing/CombineDesignSetup.php
You can use special monograming software. I don’t know anything about them because I prefer general purpose software that I can use for other things.
I use Embrilliance because it runs on my Mac as well as on a PC. Embrilliance Essentials has 12 built in Alphabets that you can use to make text, names or monograms and you can resize the lettering and the program adjusts the stitch count as you resize. It also offers some different style options for making monograms from the built-in fonts. It’s also very easy to learn and use.
Tutorials
Emblibrary has some of my favorite and most helpful tutorials online. Here are two on monograming and while you’re there, check out the others on stabilizers, etc.
Basically monograms are either 1, 2 or 3 letters which are combined or merged together. Many designers offer monogram letter design sets online. Since the maximum embroidery area of the SE400 is 3.9″x3.9″, I would suggest you look for alphabets that have several sizes such as 0.5 to 3 inch.
Depending on the width of the letters, for a three letter monogram, you maybe able to use a 1 and a half inch or 2 inch letter as the middle letter and .75 inch letters or 1 inch for the left and right letters so that all the letters fit in your 4×4 hoop.
Having several sizes of letters for one alphabet gives you lots of options to play with when making monograms.
Large letters: http://www.8clawsandapaw.com/infinity-monogram-alphabet-embroidery-design.html. This set comes in sizes from 1″ to 6″. The largest ones are too large but there is a 3″ one. The 4″ one may or may not work since the actual maximum size for the SE400 is 3.9″. You could scale it a little with embroidery software. If you don’t have software, try the free Wilcom TrueSizer.
You can save up to 12 designs (or 512KB) in the Brother SE400’s permanent memory. This is handy for saving special words or designs you’ve customized so that you can use them again, even if you turn off the machine.
When you’re finished with a design or need more room, you can easily use the touch screen controls to remove designs you don’t want anymore. Here’s how.
You can quickly get to the home screen from any screen by pressing the Embroidery key on the Control Panel. The icon looks like a hoop with a flower in it. I’ve circled this key in red in the photo on the right.
Brother calls this key the “Embroidery Key” in the Operation Manual because you press it to get to the embroidery home screen to start embroidering.
Use this key to get to the home screen for the Brother SE400, SE350, LB6800PRW, PE500, and similar machines.
Note: For the Brother PE500, the key is at the top of the right column because there are no sewing functions and therefore, no sewing home key.
Using embroidery designs from Brother’s ibroidery.com site requires that the design be linked to the machine that you’ll use to embroider the design. This allows Brother to prepare the size and format of the design that will work properly with your machine. It also allows them to copy-protect the designs, especially the special licensed character designs.
The machine ID is used to connect the machine to the design. The machine ID is unique to your machine and is different than the machine serial number.
The machine ID for the Brother SE400 is found in a Settings page using the Control panel. Press the Settings Key on the Control Panel (circled in red in the photo below):
You’ll come to the first page of settings. Press the > key until you get to the page with the machine number on it.
Brother PE770 Embroidery Machine with USB Memory-Stick Compatibility
Watch The Brother PE770 Embroidery Machine In Action
When I moved back to California from Italy, I couldn’t bring my beloved, but ancient Elna sewing machine. I wanted to get into machine embroidery, but I also needed a sewing machine. The budget was tight because of the move. So I opted for the smaller Brother SE400 which is a combination sewing and embroidery machine.
If I had had a larger budget, I would have bought the Brother PE770 instead of the Brother SE400. I love my SE400, but sometimes wish for something larger, and I would love to transfer files via a USB stick. It’s still on my wish list though.
This video from HSN demonstrates the features, LCD screen and how easy the Brother PE770 embroidery machine is to use with the LCD touch screen. They also show some embroidery projects and talk about the advantages of the USB Port which takes a thumb drive so you don’t need to have your computer next to the embroidery machine.
At the time of this video, HSN was offering the Brother PE770 for $799.95 + Shipping and Handling. This is way more than Amazon.com’s price. HSN does offer a five-month payment plan. You’ll pay more in the end, but if you need a monthly payment plan, click here to see HSN’s current offer.
When I got my Brother SE400, it had so many functions and features that I was a little bit overwhelmed. So I wanted to start with the easiest, simplest possible thing just to try out the embroidery.
I decided to start with one of the built-in designs – the large, fancy initial “A”. A for Audrey, the name of my baby grandniece. I choose the easiest fabric I could think of – a medium weight, cotton twill – that would be easy to hoop, not too heavy and not stretchy. I used Sulky Soft ‘n Sheer, cut-away lightweight stabilizer behind the fabric and hooped both of them.
This video of that first embroidery shows how to select the pattern and stitch it out. The embroidery came out very well. But there’s a lot more to learn.
Even though the hoops are a generic brand, the reviewers say that they match the Brother hoops in color and quality.
If you need the large and small hoops, you can save some money by buying the package. The cost of the three generic hoops is less than Brother’s. So you save on the price of two and get the medium hoop for free. Even though a medium hoop comes with the SE400, it’s often nice to have an extra one so you can hoop the next project while stitching the current one.
The hoop includes a clear, plastic grid. The notches and marks on the grid help you line up and accurately place the designs.
NOTE: The large hoop will not let you stitch designs larger than 4×4 inches. This is a multi-position hoop that allows you to stitch multiple designs without rehooping. For example, you could stitch a 4×4 inch design, move the hoop, and stitch a name or another design under or above the first design. For details on how the multi-position hoop works, click here.
The reviews at Amazon are generally positive. The negative reviews are because people misunderstood how the large hoop works and expected to be able to embroider larger than 4×4 inches. This is physically impossible with the Brother SE400’s embroidery unit mechanism.
You need the small embroidery hoop if you want to embroider small items or tight places that don’t fit in the standard 4×4 inch hoop such as infant clothes, socks, t-shirt sleeves, monograms on collars or cuffs.
It’s best to use the smallest hoop that the design can fit in, because it will be easier to get the fabric tight and even, reduce the chance of distortions in the design due to the extra fabric around the design, and save on stabilizer. So even if you can hoop the project in the 4×4 inch hoop, the small 2 x 1.5 inch hoop can be helpful to have if you embroider small monograms or motifs.
The adjustment screw makes it easy to hoop different weight fabrics.
The hoop includes a clear, plastic grid. The notches and marks on the grid help you line up and accurately place the designs.
There are only five reviews at Amazon, 4 5-star and 1 4-star. Here’s what one reviewer said about how she uses this hoop:
This is ideal for small embroidery projects on my Brother SE350. I used it to embroidery initials on a quilt square. It was easy to attach the small quilt square and it turned out very nice.
The Brother SA431 Small Hoop Works with these Machines
The Brother SA431 Small Hoop is for use with these embroidery machines: Brother SE-400, SE-350, LB-6800PRW, LB6770PRW, SE270D, HE-120, HE-240, Innov-ís 500D, Innov-ís 900D, Innov-ís 950D, PE-270D, PE-300S, and PE-400D.
Where To Buy The Small Brother Hoop
The best place I’ve found to buy Brother embroidery hoops is at Amazon.com. For current pricing information, availability, and to get free shipping, click here:
I’ve been getting a lot of questions about the new USB port and downloading designs. This article will explain step-by-step how to download embroidery designs from your computer into a Brother SE400.
You can connect the Brother SE400 directly to your computer (PC or Mac) with the included USB cable. You can then download embroidery designs saved on your computer into the SE400 for stitching. You can also upgrade the internal software in the SE400 when Brother releases an upgrade.
NOTE: The USB port on the SE400 only accepts a USB cable that attaches to your computer. It is not compatible with USB drives, thumb or jump drives, memory sticks, etc.
There are many websites where you can purchase embroidery designs and download them directly to your computer. Most sites have free designs you can try. You can also obtain designs on CDs. Designs on CD can either be saved to your computer first or copied directly to the SE400.
Make Sure the Design File Is Compatible with the Brother SE400:
.PES or .DST Embroidery Data File Format
The Brother SE400 can only read embroidery data files in .PES and .DST format. The best format for Brother embroidery machines is .PES because it contains information about the design such as number of stitches, number of colors, thread color names, and allows displaying an image of the design on the LCD panel.
Tajima (.dst) formats have some limitations that make them less convienent. Only the first eight characters of the file name are displayed in the LCD control panel. The image of the design cannot be displayed. Because the .dst format does not contain the thread color information, the design is displayed with Brother’s default thread color sequence. You will have to look at the design and pick the color you want for each displayed color.
Sometimes embroidery design files that you download from the Internet are “zipped.” You’ll know because the file name ends with “.zip”. On Mactinoshes and Windows XP and later, you can just double-click the file to “un-zip” it. (If this doesn’t work on Windows, you’ll need to install a free utility such as WinZip.) Then you’ll see the .pes files.
Design Fits in the 4×4 Inch Embroidery Area
Although the maximum embroidery size is commonly refered to as a 4×4 inch hoop size, it really doesn’t depend on the hoop. The embroidery unit of the Brother SE400 is physically incapable of embroidering a larger size because that’s the maximum amount the unit will move. The actual maximum size is 3.93 inches (9.98 cm or 99.8mm).
Check the File Name
The SE400 won’t recognize embroidery files with special characters in the name. If you have a file name with special characters, rename the file before uploading it to the machine. It’s safest to use only letters (upper and lowercase), numbers, “-”) and underscore (“_”) in file names.
Connect Your Computer to the Brother SE400
USB Cable Included With The Brother SE400
Plug the square end into the SE400.
Plug the flat end into the computer.
The Brother SE400 Connected to the Computer
Plug the square end of the included USB cable into the USB port on the right side of the SE400. Plug the flat end of the cable into a USB port on your computer.
Make sure both the computer and the embroidery machine are turned on.
On the SE400 LCD screen, press the USB icon. This will take you to a screen that will give you information about the designs you’re downloading.
Look at the LCD Screen
It’s helpful to glance at the Brother SE400 touch screen while you’re copying files over. The message “Transmitting by USB” will appear briefly during the actual file transfer. And then you’ll see this screen giving information about the designs you have transferred over:
The first number at the top left of the screen is the total amount of memory you’ve used. The second number is the total amount of memory space. The SE400 can hold up to 12 designs or 476KB of data in its memory. After that you have to delete some old designs if you want to download more designs.
Next there is the button (looks like a pocket with an up arrow) for retreiving the pattern.
Under the button, there is the number of the current page and the total number of pages. Two designs are displayed on each page. In the photo above, I’ve uploaded three designs. So I’m on page 1 out of 2 pages.
At the bottom, there are images of the embroidery designs on the current page.
Copy the Embroidery Design Data Files to the Brother SE400
For Windows Computers (For Macintoshes, See Below.)
Back on your PC, you’ll have “Removable Disk” listed in “My Computer”:
Open the folder on your computer where you keep the embroidery files. Navigate to the particular design you want to download to the SE400. Right-click on the design file. Click on “Send to: Removable Disk”
Do not copy .zip files. You must unzip them first.
Do not copy folders to “Removable Disk.” The SE400 cannot recognize folders or find embroidery files in folders. The individual files must be added to “Removable Disk.”
Do not copy more than 12 designs to “Removable Disk.”
For Macintoshes (For PCs, Skip This Section.)
Although the manual says the SE400 is only compatible with PCs, it’ll work just fine with a Macintosh.
The SE400 will show up as an external hard drive, named “No Name.” Just drag and drop the embroidery files to this drive.
Do not copy .zip files. You must unzip them first. Just double-click it.
Do not copy folders to “No Name.” The SE400 cannot recognize folders or find embroidery files in folders. The individual files must be added to “No Name.”
Do not copy more than 12 designs to “No Name.”
A weird thing happens on the Macintosh. The Macintosh system puts invisible system files in “No Name” which the SE400 transfers over. So the amount of memory used can be 16 to 28KB when the machine is first connected to the computer, even before you’ve downloaded any designs. These files aren’t embroidery designs so there aren’t any images. Only the amount of memory used increases. This is isn’t a problem unless you’re pushing the memory limits with large embroidery files.
Retrieve the Embroidery Pattern
Move to the screen that displays the image of the embroidery design you want using the Next Page [<] and Previous Page [>] buttons on the right. Select the design by touching the image. The selected design will be displayed in reverse highlighting.
Then, press the Retrieve key (circled in red in the photo above).
The embroidery screen appears. From here you can check the colors, adjust the pattern, embroider it and/or save it to the machine’s memory.
Embroider the Design
You can either embroider the pattern now or save it in the SE400’s memory to use later. If you want to embroider it now, make any adjustments you like, set the machine up for embroidery, and press the Start button to begin stitching.
Saving Embroidery Designs
Unsaved designs are lost when the SE400 is turned off. So if you want to use a design again without copying it from your computer, you must save it to the SE400’s memory. This is a convenient way to save names and designs that you use frequently. Or if you’re starting a project or several projects that involve several designs, you can transfer them all over at once and save them. I do this so I don’t have to keep moving my computer next to the SE400 because I don’t have a large working space.
You can save up to 12 designs or 476KB of data.
After retrieving the design you want to save by pressing the Retrieve Key and going to the embroidery screen, press the Memory button. “Saving…” appears while the pattern is being saved.
Retrieving Saved Embroidery Designs
From the first menu, press the Retrieve Key.
The saved designs are displayed. Go to the design you want using the Previous and Next Keys. Select it by pressing it. You can then delete it or retrieve it to embroider.
Hope This Helps
I get a lot of questions about how to download designs into the Brother SE400 and the manual isn’t very clear. Being able to easily transfer designs from my computer with USB is very important to me because I’m always wanting something different. So I hope this article helps you do it too.
Now that you’ve saved your designs, you might want to delete some. See my article, “How to Remove a Saved Design“.
I was searching for holiday decorating ideas when I found this project for embellishing a candle with lace embroidery over on www.embroidery.com. These candles also make nice Christmas gifts. My mother made candles, and she always gave them as hostess gifts.
The instructions say to remove the design when the candle burns down and use it as an ornament, or as an embellishment for a scrapbook or greeting card. But typically these types of candles only burn down in the middle. You can extend its life by putting a tea candle or small candle in the hole and burning that instead.
When I moved back to California after living in Italy for thirteen years, I couldn’t bring my ancient, but beloved, Elna sewing machine with me. My first thought was to replace the Elna — that is until I saw the prices! So I started looking around for a machine I could afford.
I wanted to try the new stitches and features offered by modern, computerized sewing machines. And I remembered how much I had enjoyed embroidering as a child, so I wanted a machine that would do embroidery too. I started my extensive research with the Brother SE400 Computerized Sewing and Embroidery Machine because it’s the number-one best-selling embroidery machine on amazon.com.
The Brother SE-400 has 70 built-in embroidery designs, 5 monogramming fonts, 120 frame pattern combinations, 4×4 inch maximum embroidery area, USB port and cable that connects to your computer for importing additional designs, 67 built-in sewing stitches including 10 styles of one-step automatic buttonholes, and much more that I’ll tell you about below.
Combination Sewing and Embroidery Machine
The Brother SE400 Sewing My Long Blue Skirt
The Brother SE400 is both an intermediate level sewing machine and a beginner embroidery machine in one compact machine. As a sewing machine, it does all the normal sewing functions including mending and alterations, garment construction, craft and heirloom sewing, and quilting and has special stitches to support each function. As an embroidery machine, it embroiders designs, monograms, fonts, borders, and appliques.
It’s simple to change from sewing to embroidery and back again. You just slide the embroidery arm off or on, change the presser foot, needle, thread, and you’re ready to go.
A combination machine is perfect for you if, like me, you don’t have room to store or set up two machines. Or if you need a new sewing machine or want to upgrade and also want to get into machine embroidery.
Easy-to-Use Touch Screen Controls
You control all of the sewing and embroidery functions and settings with the LCD touch-screen. You can either touch the icons with your finger or use the included stylus. One reason I chose Brother was because I don’t have to hook the machine up to my computer to embroider. It’s all controlled right here with the front panel and built-in software.
Operation Keys to the Right of the LCD Display
The keys on the right side of the panel are used for main navigation, settings, saving embroidery designs to memory, and online-help.
The keys in the left column, top to bottom are:
Back Key – Return to the previous screen.
Previous Page Key – Go to the previous page to view items that won’t fit on the display.
Next Page Key – Go to the next page to view items that won’t fit on the display.
Memory Key – Save the selected design to memory.
The keys in the right column, top to bottom are:
Sewing Stitch Key – Go to the sewing home screen – select and setup the sewing stitches.
Embroidery Key – Go to the embroidery home screen – Select and edit designs.
Settings Key – Control and view various settings for the machine.
Help Key – Online-help with basic operations on using the machine.
Sewing Home Control Screen
The main control panel for sewing appears when you turn on the machine and the embroidery unit is not attached.
You can select from 67 utility stitches and adjust the stitch length, width, etc. For each stitch, the panel shows you the width and length, presser foot, whether a twin needle can be used, and other settings.
Embroidery Home Control Screen
The main control panel for embroidery appears when you turn on the machine and the embroidery unit is attached.
Touch an icon to embroider a built-in design, words and letters using the fonts, or a frame pattern. You can also select a design from an embroidery card, the machine’s memory, or one copied from your computer using the USB port. The last key moves the embroidery unit back to its “home” position.
Beyond this main embroidery menu are a series of screens that allow you to choose various functions and settings to set up your embroidery.
Embroidery Functions
I’m assuming you want to get into embroidery because if you only want a sewing machine, you don’t need the Brother SE400. There are many other sewing machines to choose from, and you’ll get more value for your money if you buy a dedicated sewing machine. So I’ll cover the embroidery features first and get to the sewing side of the machine in a minute.
The Brother SE400 has a 4 inch by 4 inch embroidery frame. This means that the maximum design size that you can stitch at one time is about 3.875 x 3.875 inches because there has to be room inside the hoop for the embroidery foot to travel. If you want to stitch a larger design you either have to split it with software and stitch the pieces separately, or you can build up the design from smaller elements by moving the hoop or re-hooping the fabric. The optional large multi-position hoop makes this easier.
I love my Brother SE400, but I do wish it had a bigger hoop size. However, moving up to a larger hoop size is a lot more expensive and out of my budget. So I’m OK with the limitation for now.
Most designs are available for the 4×4 inch hoop, but some are only for 5×7 or larger. Whether the 4×4 hoop is OK for you depends on the type of projects you want to embellish.
No matter how many built-in embroidery patterns your machine has, sooner or later you’re going to want something different. Or you’ll have something particular in mind for a special project. So one of the most important features to consider when you’re looking at embroidery machines is how do you get additional designs into the machine.
The Brother SE400 Sewing and Embroidery Machine comes equipped with a USB port so you can transfer your designs quickly and easily from your computer to the machine. Just connect the SE400 to your computer with the included USB cable. You can transfer designs found on CD’s, the Internet and more with a simple copy and paste, or drag and drop. You don’t need any additional software. It works with both Windows and Macintosh using the computer’s software.
The Brother SE400 can save up to 12 embroidery designs or 512 KB of embroidery data in its memory pods. The built-in memory allows you to keep frequently used designs such as your child’s name in the machine for faster and easier stitching. It’s also useful for downloading several designs to stitch out later without being connected to the computer.
The SE400 only reads designs in .pes or .dst (with some limitations) embroidery data file formats. The .pes format is a very common, standard format. You can find free or reasonably priced designs on many websites.
The Brother SE400 also has a card slot for reading embroidery designs from Brother embroidery cards. This lets you use thousands of additional Brother embroidery designs including the Nickelodeon Collection and special licensed Disney characters.
You can write your own designs on cards if you prefer to manage your collection on embroidery cards rather than on your computer. But you will need an optional card writer and software.
The Brother SE400 has 70 built-in embroidery designs including flowers, scrolls, capital script letters, animals, and holiday motifs. You just select one of these designs using the LCD touch screen and the machine will guide you step-by-step through the stitching. When it’s time to change colors, the it will stop and tell you to load the next color. Practicing with these designs is the best and fastest way to get started because you always have them at your finger tips without trying to learn about downloading at the same time.
These are just basic designs to get you started and may not be to your taste. Bur remember you can easily download other designs.
Ten shapes such as circles, squares, diamond, shields, even a heart can be combined with 12 stitch patterns such as straight, scalloped or other decorative stitch, to create 120 different frame styles you can use to stitch a border around the embroidery design.
The Brother SE400 has five built-in fonts that include the upper and lower case letters, number, symbols, and accented characters for non-English language. Just select the font from the LCD screen, type in the name or word and press go. You can use the fonts to personalize clothes, pillows, towels, etc right out of the box.
You can select one of three sizes for the lettering. The exact size and spacing of the letters is slightly different depending on the font, but the small size is approximately 3/8 x 3/8 inch, the medium size is 5/8 x 5/8 inches and the large size is 1 1/4 x 1 1/4 inches.
Watch a Demo by the Enthusiasts at HSN
This video from HSN demonstrates the Brother HE-240 Sewing and Embroidery machine with USB port. It’s an exclusive model Brother made for HSN. The HE-240 is the same machine as the SE-400 with some extra accessories and a bonus.
In the video, she demonstrates the features and emphasizes how easy the machine is to use because of the LCD touchscreen and online instructions. She also shows some embroidery projects and talks about the advantages of the USB cable.
HSN sells the HE-240 for more than $500 after adding shipping and handling. You can get the SE-400 for more than $150 less at Amazon.com. The advantage of HSN is the extra accessories and bonus and the monthly payment plan. Be sure to check the prices of the ones you want. You may still get a better deal by buying them separately. Check out the HE240 at HSN.com. And check today’s price of the SE-400 on Amazon.com.
So Many Possibilities And Yet So Easy To Use
The Brother SE400 is interactive and intuitive with the large, backlit, touch-screen control. It’s so easy to operate and understand. You just look at that LCD screen and see the patterns and scroll through all the different ones. You pick one and up it comes. It shows you all the different colors so you can line your colors up in advance. It’s all push button and there they are. How easy is that?
This 4-inch-by-4-inch medium embroidery hoop for the Brother SE400 is the standard hoop that comes with the machine. This embroidery hoop is the ideal size for stitching 4-inch designs, and it’s often convenient to have another one.
If you’re as into efficiency and multi-tasking as I am, you’ll appreciate having an extra hoop. You can prepare your next project while waiting for the current stitching to finish. As soon as the machine finishes, just attach this hoop and press go. No longer will you have to wait to hoop the next project.
You can adjust the fit of the outer hoop with the screw which makes it easy to secure different weight fabrics in the hoop.
The hoop includes a clear, plastic grid. The notches and marks on the grid help you line up and accurately place the designs.
There are only two reviews at Amazon, both 5-star. Here’s what one reviewer said about how she uses this hoop:
This is a perfect match to original product and helps my embroidery projects preparation go faster. I can prepare one while the other is stitching with this additional hoop.
The Brother SA432 Medium Hoop Works with these Machines
The Brother SA432 Medium Hoop is for use with these Brother embroidery machines: Brother SE-400, SE-350, SE270D, HE-240, HE-120, LB-6800, LB6770, Innov-ís 500D, Innov-ís 900D, Innov-ís 950D, PE-270D, PE-300S, and PE-400D.
Where To Buy The Medium Brother Hoop
The best place I’ve found to buy Brother embroidery hoops is at Amazon.com. For current pricing information, availability, and to get free shipping, click here:
The 6-3/4-inch-by-4-inch large embroidery hoop for the Brother SE400 is designed to allow you to stitch designs larger than the standard 4×4 inch hoop or to combine several small designs without having to rehoop your fabric. For example, if you’ve ever wanted to add lettering or a small design to a 4×4 inch design, this large hoop makes it easier and faster.
The adjustment screw makes it easy to hoop a wide variety of fabric thicknesses.
The hoop comes with a clear, plastic grid. The notches and marks on the grid help you line up and accurately place the designs.
NOTE: This hoop does not allow you to stitch designs larger than 4×4 inches at one time, because the maximum embroidery frame area is a physical limitation of the Brother 400 embroidery unit and can’t be increased by the hoop. To stitch larger designs, you either have to split it with software, or combine smaller designs manually. It it a multi-position hoop that allows you to stitch them without rehooping.
How to Use the Large Hoop for the Brother SE400
See the four pins on the left side of the hoop? If you attach the hoop to the embroidery unit using the top two pins, the machine will stitch in the top part of the hoop. Moving the hoop to the middle two pins, will stitch in the middle. And the bottom two pins, stitch in the bottom part. The sections overlap, so you have to figure out how to place your designs within the overall area.
For example, if you want to stitch a name under a 4×4 inch design. Attach the hoop using the top two pins. Select and stitch the 4×4 design. Then move the hoop to the lower two pins. Select the name and stitch it. This is much easier and more accurate than having to rehoop and re-position your fabric after stitching each design.
Here’s an interesting way one reviewer at Amazon used this hoop:
I was able to embroider a 5-foot sign for an upcoming craft faire in just a couple of hours! It would have taken way much longer if I had used the medium hoop that came with the machine.
The Brother SA434 Large Hoop Works with these Machines
The Brother SA434 Large Hoop is for use with these Brother embroidery machines: Brother SE-400, SE-350, SE270D, HE-240, HE-120, LB-6800, LB6770, Innov-ís 500D, Innov-ís 900D, Innov-ís 950D, PE-270D, PE-300S, and PE-400D.
Where To Buy The Large Brother Hoop
The best place I’ve found to buy Brother embroidery hoops is at Amazon.com. For current pricing information, availability, and to get free shipping, click here:
In spite of several reviews around the internet based on mis-information by salesmen trying for an up-sale, I really believe that the Brother LB6800PRW is identical to the very popular Brother SE400 except for the Project Runway branding. The only difference between the two combination embroidery and sewing machines is that the Brother LB6800PRW comes with a rolling tote bag and has the Project Runway logo on the front of the machine. And, of course, the price. The price difference which used to be more than $100 has narrowed considerably this year to less than $50. So, first, are the two machines really the same? And, second, why would you want to pay more for the LB6800PRW?
Why Am I So Sure The LB6800PRW Is The Same Machine As The SE400?
When I said that the two machines are the same, in answer to a question on a review, I stirred up quite a bit of controversy. People had all sorts of misunderstandings of the features and accessories of both machines. Sometimes the descriptions aren’t clear. Some of the confusion came from salesmen. Personally, I never trust a salesman who doesn’t have what I want and is trying to sell me something more expensive instead. So I set out to learn everything I could in order to compare the two machines and share the results of my research with you.
I’m sure the Brother LS6800PRW and SE400 are identical machines because . . .
A woman in an embroidery forum reports that she asked Brother Support and they confirmed that the machines are identical.
Descriptions on merchant sites and from reliable reviews are the same.
Why Buy The Brother LB6800PRW instead of the SE400?
You’re a Project Runway fan and would really enjoy using the official Project Runway sewing and embroidery machine and the very cute PRW rolling tote bag. If you take your machine to classes and workshops or over to a friend’s house to sew together, the rolling bag would be very useful and worth having.
Sometimes the LB6800PRW is less expensive than the SE400. The Brother SE400 is so popular that Amazon has trouble keeping it in stock. When it goes out of stock, the price can go crazy as Amazon sells it from third-party vendors. And the LB6800PRW can become a much better buy. Always check both current prices before deciding which machine to buy.
If you need these embroidery supplies and accessories, the LB6800PRW with the Grand Slam Embroidery package offers incredible value for the money. It’s not always available, so be sure to check.
The Brother LB-6800PRW with Grand Slam Package includes:
Brother LB-6800PRW Project Runway Computerized Sewing and Embroidery Machine with USB Port
67 built-in sewing stitches • 70 built-in embroidery designs • 120 frame pattern combinations • 5 monogramming fonts • USB port with computer connectivity for importing embroidery designs • automatic needle threader • push-button thread cutter • back-lit LCD touch screen with help and reference guide • 4×4 inch embroidery area • Quick-Set drop-in bobbin • automatic bobbin winding • One-touch start/stop/reverse button • operates with or without foot control • electronic variable sewing speed control allows you to choose your most comfortable sewing speed • free arm/flatbed convertible sewing surface • lots of accessories • Project Runway rolling bag
Polystar Embroidery Thread on Snap Spools and Thread Box
You get 61 mini-king spools, each containing 1,000 meters of 50 wt. Polystar embroidery thread in shiny and vibrant colors. You never need to convert the colors because the Brother color names and numbers are printed on the bottom of each spool. The thread is stored securely in individual compartments in the thread box. The snap spool design prevents the thread from unraveling and helps you easily find the end of the thread.
The Grand Slam Embroidery Packages includes 144 pre-wound bobbins, 95 meters each, 100% spun polyester bobbin thread in white color, style M.
15,000 Embroidery Designs
This set of three CDs has over 15,000 professionally digitized embroidery designs — from angels to zoo animals, there’s something to suit any project.
Just connect the LB6800PRW to your computer with the included USB cable and copy the designs over. You can copy either directly from the CD, or save them on your computer first. There’s no need for a card writer box and extra software because the download software is built into the LB6800PRW and uses the USB port. Works on both Windows and Macintoshes.
All the designs are in .pes format which is the preferred format for Brother embroidery machines. This means that you don’t need embroidery software or an extra step just to convert the format. The designs are ready to go.
Cap Hoop
The cap hoop allows you to embroider logos and names on baseball-style caps and hats. It attaches to the 4×4 inch embroidery hoop that comes with the LB6800PRW and holds the cap bill firmly outside the hoop while you embroider on the cap itself. You can personalize caps for your whole team with this cap hoop. You can find instructions for using the cap hoop in my post, “Cap Hoop for Brother SE400 Embroidery Machine.”
Tear & Wash Stabilizer
Stabilizer is essential to support the fabric and hold it in place for embroidery. Without proper support, designs can pucker, pull or snag. Tear & Wash Stabilizer is torn away after the design is stitched and the rest dissolves in the wash, leaving a clean result.
Stork Embroidery Scissors
These charming little scissors are perfect for fine detail work. The needle-sharp point gets into all those hard-to-reach places. The stork scissors come in a beautiful leather case with a magnetic button for easy closing.
Thread Converter Pro III
When you have a large inventory of embroidery thread from different brands, it can be difficult to know which colors to use for a particular design. Thread Convert Pro III makes it simply by converting thread colors from fourteen different thread manufacturers.
This software converts thread colors to and from Brother or Polystar, Sulky, Madeira, Guterman, Coats & Clark, DMC, Robison Anton, AngelKing, Kingstar, Isacord, Isafil, Marathon, Anchor, and Pearl Yacht.
All You Need To Get Started
With the Brother LB6800PRW sewing and embroidery machine plus the Grand Slam Embroidery package, you have everything you need to get started embroidering except fabric or your creative project to embroider on.
Check Out The Three Choices
The prices and availability of the Brother SE400, LB6800PRW, and LB6800PRW with Grand Slam Embroidery Package are always changing. So you need to compare all three to find the best value. I almost always find the best price at Amazon, and I’ve always been very happy with their service, so I always look there first.
Check the current price and availability of the Brother SE400 here:
Check the current price and availability of the Brother LB6800PRW here:
Check the current price and availability of the Brother LB6800PRW with the Grand Slam Embroidery Package here:
I hope that this extensive information helps you choose the right embroidery machine for you. Have fun with your new hobby.
If you want to personalize caps and hats with designs such as logos, initials, names, you’ll need a cap hoop.
The cap hoop attaches to your regular 4×4 inch hoop and holds the bill of the cap firmly in a clamp outside of the embroidery frame. The cap itself is attached to the hoop with adhesive stabilizer. Some people also pin the cap for extra security.
The only negative that people report is that sometimes they can’t get the embellishment as close to the brim as they would like. However, this seems to be a limitation of all home embroidery machines and not the particular hoop.
This Cap Hoop clamps to 4×4 inch embroidery hoops and will work with the Brother SE400, SE350, SE270D, HE120, HE240, Innovis 500D, Innovis 900D, Innovis 950D, LB6770PRW, LB6800PRW Embroidery Machines.
Where To Buy The Cap Hoop
Cap hoops for the Brother SE400 are hard to find, but Amazon finally got a reasonably priced one back in stock. To check the availability and price @Amazon.com and get started embroidering your caps, click here:
Here’s what one reviewer had to say:
Great — 5.0 out of 5 stars, May 15, 2010
By LatinaSunRise (Manhattan, NY), Amazon Verified Purchase Used it on my Greatgranddaughters hat and it works great… Doing a few more. Amazon you guys are great.
How To Embroider A Cap With The Brother SE400
Cut a piece of adhesive stabilizer slightly larger than the cap hoop frame and pull the backing off. Stick the stabilizer to the bottom frame of the cap hoop. Try wrapping the stabilizer around the edges of the cap hoop, if it doesn’t stick tightly enough.
Using a water-soluble pen, mark the center of the design on the cap.
Loosen the back strap on the cap. Unscrew the thumbscrew on the hoop clamp to and slide the cap bill under the clamp. Using the markings you made on the cap and the template grid, arrange the cap so that the center of the design aligns with the center of the hoop.
Before you tighten the clamp, make sure the sweatband and backing are pulled away from the embroidery area so that you don’t stitch it to the cap. You may have to tape or pin the sweatband to keep it out of the way. The buckram (stiff backing) under the sweatband also has to be pulled back. If necessary to pull it back neatly, cut the buckram an inch or two where it is stitched to the cap bill on each side. Tighten the clamp with the thumbscrew.
Starting in the middle and working out to the edges, press the cap down firmly against the adhesive stabilizer. The cap must be as flat and smooth as possible.
Clamp the cap hoop to the regular 4×4 inch hoop on the side opposite where it attaches to the embroidery unit.
Turn the SE400 on and set it up for embroidery as usual. Turn the embroidery unit on and attach the regular 4×4 inch hoop with the cap hoop attached. You may have to remove the foot and/or shank to do this. Use the curser keys to center the needle and begin to embroider your design onto the cap. Remember, the design must be rotated clockwise a quarter turn because the cap is hooped sideways and you want the design vertical.
Using the cap hoop is easier to show than to write about. Someday, maybe I’ll get a camera and make a video. Practice a few times on an old hat or cap and you’ll have the hang of it in no time.
To check the availability and today’s price of the hoop at Amazon.com and get started embroidering your caps, click here:
The Brother SE400 comes with a standard 4×4 inch embroidery hoop. But if you need additional hoops for a special project, this package offers an outstanding value. You get:
Extra-large 3-position embroidery hoop
Standard 4×4 inch embroidery hoop
Small hoop
A grid to aid placement for each hoop
7 spools of Polystar embroidery thread
A pair of stork embroidery scissors
These hoops are made to fit the Brother SE-400, SE-350, SE-270D, HE-120, HE-240, Innovis 500D, 900D, 950D, LB6770PRW, LB6800PRW. They also fit the Babylock Sofia A-Line and Babylock Intrigue.
Extra-Large 3-Position 4×6 Inch Embroidery Hoop
The extra-large hoop allows you to embroider more than one design without re-hooping. It’s particularly useful for adding a name or another design to a 4×4 inch design. You can also embroider several small items such as button covers or miniature FSL, etc. in one hooping.
It works because of the 3-position connections on the side of the hoop. You stitch out the first design and then simply move the hoop to the next set of connections for the next pattern. The SE400 embroiders in a 4×4 field within the larger hoop depending on where you attach the hoop.
This hoop saves you time, stabilizer, and makes it easier to get the multiple designs perfectly lined up because you don’t have to re-hoop and shift the fabric.
Note: You still can’t embroider a design larger than 4×4 inches at one time. That’s a physical limitation of the machine.
Small 1.5×2 Inch Embroidery Hoop
This small hoop is perfect for embroidering socks, pockets, or other small items, especially things for babies. Always use the smallest possible hoop for your project because you’ll use less stabilizer and it’ll be easier to get the fabric tight in the hoop.
Standard 4×4 inch embroidery hoop
The Brother SE400 already comes with a 4×4 inch hoop. But if you’re addicted to multi-tasking like I am, you’ll appreciate having an extra hoop. You can hoop your next project while waiting for the current stitching to finish. As soon as the machine finishes, just attach this hoop and press go. No longer will you have to wait to hoop the next project.
7 Spools of High Quality Polystar Embroidery Thread
This package also includes 7 spools of Polystar embroidery thread in shiny, vibrant colors for gorgeous embroidery. You get 1,000 meters of polyester thread on each spool. The thread is 50 weight and comes off the spool easy because of the mini-king spool design.
*Thread colors will vary.
Stork Embroidery Scissors with Leather Case
These charming “stork” scissors are perfect for the fine detail work that requires a needle-sharp point to reach into tiny places such as applique, monogram work, trimming stabilizer, and embroidery. They’re beautiful as well as practical with the gorgeous engraved stork design. And it comes in a beautiful leather case with a magnetic button for easy closing.
Where To Buy The Hoop Set
If you need more than one of these hoops, you can get a great deal with this set of small, medium and large hoops plus get the bonus embroidery thread and scissors too. Amazon is offering this package for $100 (59%) off today. Check the current price and availability here:
Brother PE770 Embroidery Machine with USB Memory-Stick Compatibility
Mr. Ali – Our Tailor In Calcutta
I saw a lot of gorgeous embroidery when my friend and I were in India last year. She really got into it, and we spent more time at the tailor’s and fabric shops than we did sightseeing. Embroidery is hot in India. Even the young, modern girls who don’t often wear their traditional dress, have embroidery on their jeans and tee-shirts.
All this elegant embellishment reawakened my childhood love and when I got back home, I started researching embroidery machines. I always do a lot of research before spending so much money, and I hope it helps you too.
My First Choice
I did make the 40-minute trek to my local dealer. But he only had large machines costing thousands of dollars — way out of my price range. So I started looking online.
The Brother PE770 was my first choice: a lot of value for the money at under $600; a step up from the “standard” 4×4 inch hoop to a 5×7 inch embroidery area; USB stick compatible for easy importing designs without having to hook up to my laptop, and all the easy-to-use features I’m used to from my Mother’s Brother sewing machine.
These are the most important features in my opinion that differentiate the Brother PE770 from the SE400. The easy-to-use features such as the automatic needle threader (which I absolutely love because my eyes aren’t what they used to be), quick-set bobbin, and auto thread trimmer are the same on both machines. The PE770 does have many more built-in designs, but I almost always want other designs that I download, so that doesn’t matter to me.
Built-In USB Flash Drive Port
Download Additional Embroidery Designs From A USB Flash Drive
Compatible with Brother Memory Cards And USB Flash Drives
One of the most important things to consider when you’re looking at buying an embroidery machine is how do you download embroidery designs. No matter how many built-in embroidery patterns a machine has, sooner or later you’re going to want more. Maybe the style of the built-in designs isn’t to your taste. Or maybe you just need something particular for a special project. You’re going to want to stitch a different design easily and without a lot of additional expense.
In addition to the memory cards, the Brother PE 770 has a USB port that accepts a USB flash drive. Flash drives go by various names including thumb drives, memory stick, USB keys, and they are cheap and readily available. The PE770 can read up to 200 embroidery designs that you’ve previously saved to the thumb drive. You can copy designs from CD, or find a vast variety of free and reasonably-prices designs on the Internet. You can then stitch them out simply by plugging in your USB flash drive and picking the one you want to embroider. Or store up to 12 patterns in the machine’s memory to use anytime.
In my opinion, the USB flash drive is the best method for transferring embroidery designs because you don’t need additional software and you don’t have to move your computer next to the embroidery machine. Just download embroidery designs from the Internet, save them on a flash drive, and import them into your Brother PE770 later.
5 x 7 Inch Embroidery Field
5 x 7 Inch Embroidery Area
The Brother PE770 has a larger 5×7 inch embroidery field. Although many projects are available for the 4×4 inch frame size, many of the best designs are larger. With the PE770, you can take advantage of all these. And often you’ll want a larger sized monograms on a towel, for example, or the back of a jacket or t-shirt. It may not sound like a big different, but compare the sizes side-by-side and you’ll see a big difference in what you can do.
Embroidery-Only Machine
The Brother PE770 is a dedicated embroidery machine. It doesn’t do sewing. You can leave it set up for embroidery and not have to switch between sewing and embroidery. You can also work on the sewing parts of the project or a different project while the PE770 happily embroiders along. You don’t have to wait for it to finish embroidering just because you need to hem a pair of pants. The Brother PE770 is a precision embroidery machine. It does one thing and does it very well. This also means that there are no compromises trying to fit sewing features in.
Value For Money
In short, if you want an intermediate embroidery machine that is affordable and gives you a lot of features and value for the price, check out the Brother PE770.
Embroidering gifts and things for babies is one of the most rewarding projects you can do with your Brother SE400. All the little things that babies need are just so cute that they naturally inspire you to personalize them with embroidery. Personalized gifts are fun to make and especially enjoyable when you see how much parents appreciate them.
Two Simple Steps To Personalizing Baby Items
First, find an appropriate embroidery design for the motif. There are a lot of choices: People like pretty designs and colors for little girls — flowers or princesses or magical things. Stronger colors for boys and sports or games. Animals and cartoon characters are for everyone Now, just as I write this, I’m disturbed by my stereotyping, especially as I wasn’t at all that kind of little girl. So you might want to avoid the common ideas. You can find a vast number of embroidery designs on the Internet for free or a reasonable price and easily transfer them into the Brother SE400 via the USB port. You’re sure to find designs to suit any taste and baby.
Then, to personalize the design, add the baby’s name or initials, and/or any cute, meaningful, or inspiring saying depending on the type of the item.
Ideas For Baby Items That You Can Embroider
Bibs are essential for containing the baby’s first messy attempts at feeding themselves. You can either make them yourself or buy plain ones in bright colors ready to embellish. Just stitch the design in the middle and add the baby’s first name. Or for the easiest option, buy bibs with a design you like and just embroider the baby’s name underneath to personalize it.
Burp Cloths – In addition to a cute motif relating to milk such as a cow, people love to embroider funny or clever sayings such as “Got Milk” or “Spit Happens.” Or you can simply embroider any design such as a flower or cartoon figure with the baby’s name underneath.
Baby towels and washcloths embellished with names, initials or designs.
It seems like babies need a lot of clothes — onesies or bodysuites, sleep suits, hats, bootees and socks, dresses and shirts, — the list goes on and on. You could make a complete outfit with coordinated embroidered designs or embroider just one item. People love onesies with funny sayings and unique graphics. To make it special, personalize it by embroidering her name or a slogan like “Daddy’s Little Girl.” Or for a boy, a spots design or a funny saying. If you knit or crochet, you can make adorable little hats. Because they’re so small, the work goes very quickly and it’s a lot of fun. Or buy plain hats and embroider adorable designs on them. Or buy hats with a design you like and just embroider the baby’s name. Booties can be knitted or just embroidered with a tiny motif and initial.
Hooded towels are very practical for wrapping the baby in after a bath. Personalize it with his name or initials.
Baby or crib blankets give you more room for creative designs. As well as decorative designs, you can add the baby’s name or initials; and/or date of birth and weight and length at birth.
Gifts for a new baby are a perfect opportunity for expressing your creativity and wit. In this world of machines and factories, nothing says how much you care like something handmade. I hope this article gave you some good ideas for making your next baby gift extra special by adding your own creative touch.
Store your own customized or downloaded embroidery designs on blank memory cards that fit into the card slot of the Brother SE400. The cards can be convenient if you want to use more designs than can fit into the machines internal memory and you don’t want to have to move your computer next to the machine and copy in new designs.
This memory card holds 4 megabits worth of embroidery data. The exact number of designs it will hold depends on the number of stitches in the designs. Complicated designs with more stitches take up more file space.
The blank embroidery card is rewritable. You can store all your designs organized on your computer. Write the ones you need for your current project on the card. For your next project you can erase the old designs and write new ones on the card, using the card over and over again.
You will need software and a card writer, such as the Brother PED Basic or PE-Design Software, to write the embroidery designs on the card. The Brother SE400 can only read the cards. It cannot write them.
NOTE:The Brother PED-Basic Software for writing the cards includes a blank memory card. And right now Amazon.com is selling the software package for less than the cost of the blank memory card alone.
The Brother SE-400 has 67 built in stitches for various types of sewing, including 10 styles of 1-step buttonholes. The stitches include several styles of Straight, Zigzag, Overcasting, BlindHem, Applique, Stretch, Patchwork, Quilting, Eyelet, Smocking, Decorative, Heirloom stitches and Side Cutter stitches. Side Cutter stitches, using an optional side cutter foot, finish seams by overcasting and cutting off the extra seam allowance similar to what a serger does.
The stitch length is adjustable up to 5mm and the stitch width up to 7mm for some stitch patterns. Stitch attributes include: Mirror, twin, multi-directional, side cutter, satin stitch regulator.
To select a stitch, use the arrow keys on the LCD touch screen to move through the stitch icons on the screen, select the stitch and choose the stitch settings.
Here are the utility and decorative stitches built into the Brother SE400:
Number
Stitch Name
Application
1
Straight stitch
Basic stitching, sewing gathers or pintucks, etc.
2
Straight stitch
Basic stitching and sewing gathers or pintucks
3
Straight stitch
Attaching zippers, basic stitching, sewing gathers or pintucks, etc.
4
Triple stretch stitch
Attaching sleeves, sewing inseams, sewing stretch fabrics and decorative stitching
5
Stretch stitch
Sewing stretch fabrics and decorative stitching
6
Basting stitch
Temporarily securing
7, 8
Zigzag stitch (left and right)
Overcasting and attaching appliqués
9
2-point zigzag stitch
Overcasting on mediumweight or stretch fabrics, attaching
elastic, darning, etc.
10
3-point zigzag stitch
Overcasting on mediumweight or stretch fabrics, attaching elastic, darning, etc.
11
Overcasting stitch
Overcasting on thin or mediumweight fabrics
12
Overcasting stitch
Overcasting on thick fabrics
13
Overcasting stitch
Overcasting on thick fabrics and decorative stitching
14
Overcasting stitch
Overcasting on stretch fabrics
15
Overcasting stitch
Overcasting on thick or stretch fabrics
16
Overcasting stitch
Overcasting on stretch fabrics and decorative stitching
17
Blind hem stitch
Blind hem stitching on mediumweight fabrics
18
Blind hem stitch
Blind hem stitching on stretch fabrics
19
Appliqué stitch
Appliqué stitching
20
Shell tuck stitch
Shell tuck stitching
21, 22
Piecing straight stitch
Piecing straight stitching (right and left)
23
Straight stitch that looks hand-sewn (for quilting)
The Brother SE400 Computerized Embroidery and Sewing Machine comes with seven sewing feet (buttonhole, overcasting, monogramming, zipper, zigzag, blind hem, and button) and one embroidery foot. Other special purpose presser feet can make certain projects easier, faster, or more convenient.
Overcast fabric edges and trim seam allowance at the same time with Brother’s SA 177 7mm side cutter foot. This handy, easy-to-use attachment measures and finishes fabric edges with straight or zigzag stitches similar to a serger. The centered post ensures consistent stitch formation.
Overcast fabric edges and trim seam allowance at the same time with Brother’s SA 178 5mm side cutter foot. The difference between the SA178 and the SA177 is the width of the seam allowance remaining. But 2mm is a very small amount.
Many people are asking me to compare the Brother HE-240 and the Brother SE-400. Actually, it’s confusing because there aren’t that many differences between the SE400 and the HE240.
The Brother SE 400 Sewing and Embroidery machine is a newer machine that is identical to the older Brother HE240.
In short, here are the major differences:
The HE-240 is sold only by HSN. The SE-400 can be bought many places online and in retail stores.
HSN’s price for the HE240 is a lot more than Amazon’s price for the SE-400. Amazon has the best price that I’ve found.
HSN does include some extra accessories for the higher price. See below.
The Brother HE-240 is an exclusive model sold only by HSN. Brother made the HE240 by adding an USB port to the SE350 before the SE400 came out. I don’t know if Brother added any tweaks to the newer SE400, but there are no essential differences between the two models. The SE400 does have the ability to upgrade the internal software through the USB port.
HSN does throw in a few extras such as a cording foot, narrow hem foot, piecing foot, and a very nice accessory case. But HSN charges $130 more than Amazon. If the extra accessories are worth the extra money to you, than buy the HE240 from HSN. But be sure to check the price of the accessories separately. If you only need one or two, you’ll be better off buying them separately. Another advantage of the Brother HE-240 is that HSN offers a monthly payment plan. Otherwise your best buy is the Brother SE400 from Amazon.
Either way, they are both great little machines, offering a lot of value for the money in a combination sewing and embroidery machine.
You can download three Brother SE400 Operation and User’s Manuals in PDF format from Brother’s website. Here are the direct links because it can be hard to find the exact place.
A 172 page manual describing the Brother SE400 and how to use all the various functions: Getting Ready, Sewing Basics, Utility Stitches, and Embroidery.
This manual describes how to use the USB port and cable to connect the SE400 to your computer; how to import embroidery designs into the SE400 from the computer; and how to use a computer to upgrade the SE400’s software.
Briefly, the Brother SE-400 Computerized Embroidery and Sewing Machine is the same as the Brother SE350 with an USB Port for computer connectivity. This USB port enhancement means that you don’t need to buy expensive software and a card reader/writer when you want to expand beyond the built-in embroidery patterns.
The Brother SE350 has been discontinued and replaced with the SE400. Except for the USB port, the Brother SE-400 is identical to the SE-350.
The USB port on the side of the Brother SE400 connects the SE400 directly to your computer with the included USB cable. You can then download embroidery designs from your computer into the SE400 for stitching. You can also upgrade the internal software in the SE400 when Brother releases a system upgrade.
Note: The USB port on the Brother SE400 is the type of USB port that accepts a USB cable and attaches to a computer’s USB port. It is not compatible with a USB thumb drive or memory stick.
Brother SE400 vs SE350 is really a no-brainer. The SE350 has been discontinued, but is still selling new for a price equal to or greater than the upgraded SE400. You can sometimes find a better deal, but remember to include the cost of the software and card reader/writer you’ll need to download additional embroidery designs. No matter how many built-in designs an embroidery machine has, sooner or later, you will want more.
If you’re looking at buying a Brother embroidery machine, there are a lot of options and features to consider.
You need to know which features are important to you, what you really need, and what options you’re willing to spend the money for.
Three of the most important factors to consider are:
Dedicated embroidery machine or a combination sewing and embroidery machine
The size of the embroidery field
How you download additional designs into the machine.
This article will explain how these features differ among 3 of the most popular home Brother embroidery machines. If you’re looking for an embroidery machine, this information will help you get started.
Dedicated Or Combination Machine
If you have a sewing room or space to leave two machines set up, or if you do a lot of embroidery, you probably want a dedicated embroidery machine. Or if you already have a good sewing machine that you like, you don’t need another one. The advantage of a dedicated embroidery machine is that you don’t have to take down the embroidery unit just because you want to hem a pair of pants or some other small sewing task. The disadvantage is that it’s also convenient not to have to switch machines if you want to embellish the sewing project you’re working.
Dedicated embroidery machines usually cost more, but are higher-end machines. So you also get more features. If you need the extra capabilities, you may have to get a dedicated machine.
The Brother SE400 and Brother SE350 are combination embroidery and sewing machines. The Brother PE770 is a dedicated embroidery machine. It doesn’t do sewing.
Embroidery Field Size
Many embroidery designs are available that fit in a 4×4 inch frame. But a lot of designs require 5×7 inches. You can make up larger designs by combining the smaller motifs, but you can only embroider up to the frame size without disconnecting the design and repositioning. Sometimes, you can split a large design with embroidery editing software. Of course the larger field costs more, but is a lot more convenient if you want larger designes.
The Brother SE400 and SE350 have 4″ x 4″ embroidery fields. The Brother PE770 has the larger 5″ x 7″ field.
Downloading Additional Embroidery Designs
There are three basic ways to download additional embroidery designs into a Brother embroidery machine.
The first way is with Brother embroidery cards.
You can buy designs already on a Brother embroidery card. The cards can be expensive, but if you want a special design, this might be the only way to get it. You can also download free and low-cost designs from the Internet and write them to a card.
You will need additional software and a card writer/reader such as the Brother PED Basic software to write the designs on a card. This is an additional expense, but blank cards are expensive and as one comes with the PED Basic package, you are getting the software and card writer virtually for free. Even if your machine has a USB port to download designs, the embroidery machine cannot write the cards. You need a separate card writer.
The Brother SE350 only has a memory card slot. So the only way to download additional designs is with a memory card. The SE350 has been discontinued and replaced with the SE400. So I no longer recommend the SE350 unless you can get a really cheap price. Remember to add in the cost of the software you’ll need.
Cable USB Port That Attaches To A Computer
The second level of downloading additional embroidery designs is through a cable USB port. This is the kind of USB port that attaches to your computer with an included USB cable. You just download designs from the Internet into your own computer, attach the embroidery machine, and import them. This type of USB port is not compatible with a USB jump drive.
The Brother SE400 has both a Brother embroidery card slot and a USB port and cable that attaches to your computer for downloading.
USB Port Compatible With A Thumb Drive
The third (and best, in my opinion) option, but also the most expensive, is a USB port that is compatible with a jump drive or memory stick. This is very convenient because you don’t have to move your computer next to the embroidery machine or even have a computer all. You can download designs into any computer and store them on the jump drive. Then just put the jump drive into the USB port and download them.
The Brother PE770 has both a Brother embroidery card slot and a USB port that takes a jump drive.
Hope This Helped
If you’re interested in one of these machines, you can find out all about the benefits and differences here:
This Polystar set contains 61 spools with 1,100 yards each of high quality polyester embroidery thread. The thread comes in a Polystar Storage Box with two thread trays.
The thread is vibrant, strong, and is a pleasure to work with. Using modern technology, the colors exactly match those in the Brother built-in designs and optional embroidery cards. The corresponding Brother color names and numbers are printed on the bottom of each spool.
Unlike the 40 weight of some cheaper threads, the Polystar thread is 50 weight which is the weight the Brother SE350 is set up at the factory to use. This means that you can usually just start embroidering with the pre-set tension.
The Polystar 61 Set is now wound on Snap Spools to prevent your thread from unraveling. Simply pull on the base of the spool, lay your thread in between the top of the spool and the bottom of the spool and simply push down. Your thread will no longer unravel and will stay nice and tidy in your Polystar Storage Box. The snap spool also helps you find the end of the thread easily.
Keep commonly used threads close at hand and neatly organized with Brother’s SA503 thread stand. Great for both sewing and embroidery threads, the stand holds up to 10 spools of various sizes and sits out of the way behind the machine. Each numbered spool holder has its own guide to deliver thread smoothly to the machine, and the thread locking system keeps loose ends in place when not in use. Goodbye snarls and frustrating searches–Hello maximum efficiency! For use with the Brother SE350 and other selected Brother models.
61 Large Spools of 1100 yards 40 Weight Polyester Embroidery Machine Thread, Same color and number as Brother Thread. Also Includes Wooden Thread Rack. The thread is a very nice quality with a beautiful range of colors for a great price.


 I lived in the hills outside of Assisi, Italy for 13 years. Assisi is the charming Italian hill-town where Saint Francis was born and is one of my favorite cities in all the world. Thanks to local building regulations, much of the 14th century town is preserved.
 Assisi embroidery is based on a medieval Italian tradition where the motifs are outlined in a double running (Holbein) stitch, leaving the interior void. In the earliest work, the stitches were not counted. The design was just drawn freely on the linen. In modern adaptations, Assisi embroidery is counted-thread embroidery.
 The following characteristics make Assisi Embroidery so powerful and charming, and distinguish it from other voided styles.
 Tablecloth worked by Antonietta Mancinelli, Accademia Punto Assisi.
 Italy has an ancient tradition of arts and crafts including embroidery and other handicrafts. In the 13th century, an embroidery style was created in the convents probably by the Poor Clares that became the basis for Assisi embroidery. The motifs were voided on fine linen cloth with the outlines and background embroidered with colored silk. These articles were used for religious purposes such as altar cloths and chasubles.


 Key") You can quickly get to the home screen from any screen by pressing the Embroidery key on the Control Panel. The icon looks like a hoop with a flower in it. I’ve circled this key in red in the photo on the right.
You can quickly get to the home screen from any screen by pressing the Embroidery key on the Control Panel. The icon looks like a hoop with a flower in it. I’ve circled this key in red in the photo on the right.
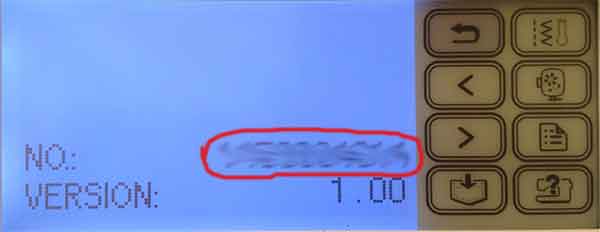


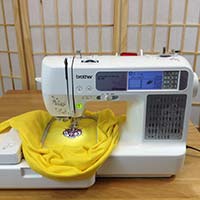

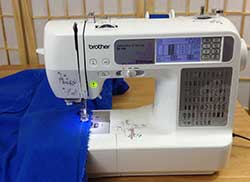


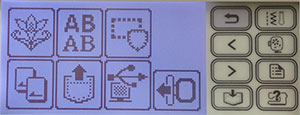


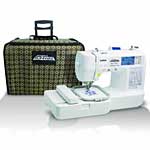


 Polystar Embroidery Thread on Snap Spools and Thread Box
 144 Pre-wound Bobbins
 15,000 Embroidery Designs
 Cap Hoop
 Tear & Wash Stabilizer
 Stork Embroidery Scissors
 Thread Converter Pro III


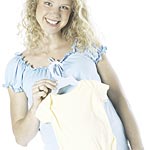
 Embroidering gifts and things for babies is one of the most rewarding projects you can do with your Brother SE400. All the little things that babies need are just so cute that they naturally inspire you to personalize them with embroidery. Personalized gifts are fun to make and especially enjoyable when you see how much parents appreciate them.
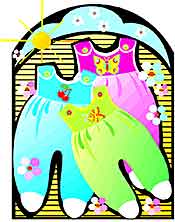 Bibs are essential for containing the baby’s first messy attempts at feeding themselves. You can either make them yourself or buy plain ones in bright colors ready to embellish. Just stitch the design in the middle and add the baby’s first name. Or for the easiest option, buy bibs with a design you like and just embroider the baby’s name underneath to personalize it.


 Note: The USB port on the Brother SE400 is the type of USB port that accepts a USB cable and attaches to a computer’s USB port. It is not compatible with a USB thumb drive or memory stick.
 If you’re looking at buying a Brother embroidery machine, there are a lot of options and features to consider.
 You can buy designs already on a Brother embroidery card. The cards can be expensive, but if you want a special design, this might be the only way to get it. You can also download free and low-cost designs from the Internet and write them to a card.
 The third (and best, in my opinion) option, but also the most expensive, is a USB port that is compatible with a jump drive or memory stick. This is very convenient because you don’t have to move your computer next to the embroidery machine or even have a computer all. You can download designs into any computer and store them on the jump drive. Then just put the jump drive into the USB port and download them.